Playtime Scheduler For Pickleball-An Easy App To Use-2024

The Playtime Scheduler for Pickleball is a free application that allows you to easily find people/pickleball players in your area who are looking for someone to play with.
To get started, simply sign up for a free account on the Playtime Scheduler app for pickleball, specifying your desired town or area, and log in. You can also use the playtime scheduler application for iPhone. This application is compatible with PC/iPhone and Android mobile. This handy playtime scheduler provides comprehensive player schedules for pickleball courts in your specific location.
One of the great features of this app is that it color-codes information about different courts, including their location, skill level, and start times. You can effortlessly add your name to an existing scheduled session or create your own pickleball session. So why wait? Take advantage of this amazing tool and start enjoying your pickleball games today!
How to register for a PlayTime Scheduler (PTS) account
To register for a PlayTime Scheduler (PTS) account, follow these simple steps:
- Visit the PlayTime Scheduler website or download the PTS Android mobile application or iPhone from your app store.
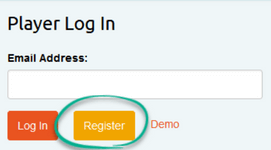
- Look for the registration or sign-up option on the upper left side of the application page and click on “Register”.
- Put the requisite information, such as your own name, email address, and password according to your desire.
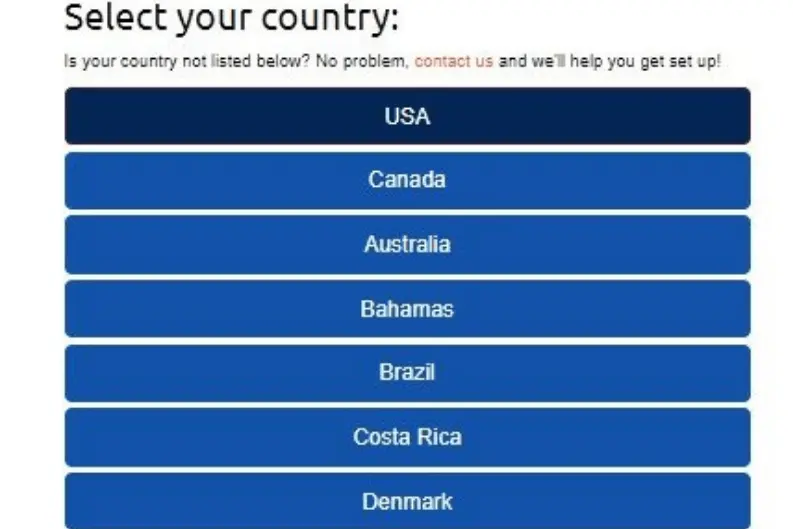
- Choose your Own Country(USA/Canada/Australia)
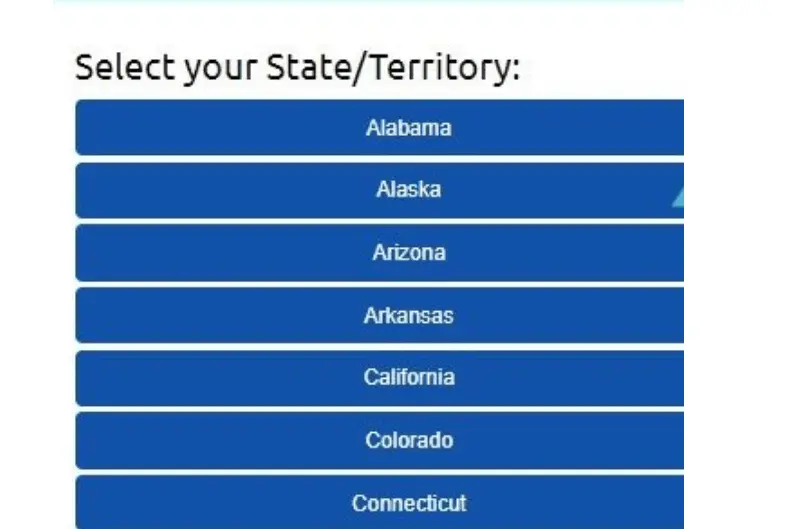
- Choose your own State/Territory(Alaska/Arizona etc)
- Choose the Zip/postal Code of your own region(Fairbanks/Phoenix)
- Choose your court area or searched regional areas.
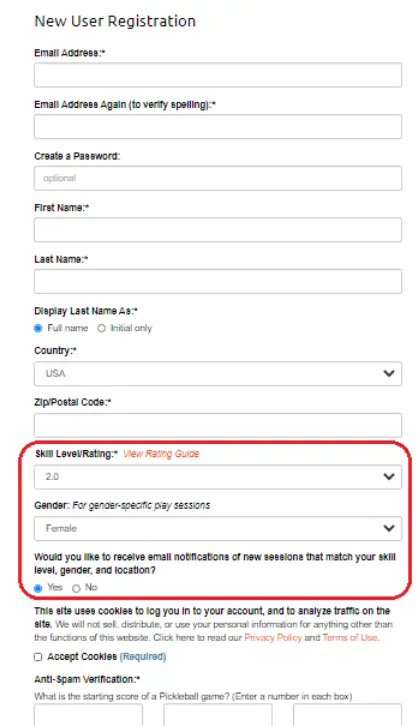
- Then Filled in the New User Registration Form(including skill level/ratings, gender, and Answers to simple 2 questions, to Move further.
- Then Add session details and date, time, etc.
- Once you’ve put your email address, you’re advised to verify it to complete the whole process. Once your email address is verified, you’re all set!
- Remember to keep your account credentials secure and always follow any guidelines or rules set by the PlayTime Scheduler platform. Enjoy your pickleball experience with the convenience of the PlayTime Scheduler!
How to Use Playtime Scheduler Application
How to use Playtime Scheduler:
- Ensure that your email address is visible within the “Player Log In” field.
- Please click on the “Log in” button.
- Upon accessing the weekly calendar page, a pop-up window will appear before you, displaying a warning message. It clearly indicates that “PlayTime is a Communication Tool NOT a court Reservation System. Arranging a session on PlayTime does not provide you with any privileged access to a court. It’s important to note, read, and fully understand this warning. Always note and read it at least once and remember its contents.
- Please click the option “Got it!” button.
- Check and verify that the displayed region matches your desired location. If required, you can switch to view play options in other selected areas, such as “Fairbank/Phoenix, OR”.
- The Scheduler presents a calendar featuring colored circles that represent play sessions created by other users. In every circle, you can find relevant information about your desired skill level(s), beginning time, and the present/current number of players. These sessions are color-coded based on the general area of the location (refer to the Key for details). Bold border circles show sessions in which you’ve got registered to participate. Grayed-out circles labeled as “CANCELED” at the bottom indicate canceled sessions. Additionally, session circles with a yellow glow highlight special events.
- The calendar is designed to show a 7-day period at once. You have the option to display a weekly calendar from Sunday to Saturday or have it start with today’s date. To explore between different weeks, you can click on the right arrow at the top to move to the following week, or click on the left arrow to go back to the previous week. On mobile devices, you can also directly access a specific calendar week by clicking on the “Jump To” button, which is represented by a calendar icon. This allows you to quickly navigate to the desired week without having to scroll through the calendar. Please note that past sessions are grayed out and inaccessible unless you have Power User privileges.
- To start creating a new public session, you have two options. You can click the “Add Session” button, or if you’re using a desktop computer, you can place your cursor over a future date on the calendar and click the (+) button. When creating the new session, you will have the option to specify the date, start time, end time, location, desired player skill level(s), and minimum and maximum number of players, as well as include any additional notes or comments. As you continue using the system, it will learn your preferences and automatically default to them when you begin adding a session.
- Premium Users enjoy additional options when creating sessions. They have the flexibility to specify the play format, such as doubles, singles, or drills, as well as the option to choose the gender composition of the session, whether it’s for women, men, or mixed play. Premium Users also have the ability to block guest sign-ups if desired.
- Premier Users, on the other hand, have even more advanced features at their disposal. They can add a playtime scheduler waitlist to manage potential participants, highlight a session as a special event for increased visibility, create block lists to restrict certain users from signing up, set a guest limit for the session, and even have a session repeat for up to 8 weeks, saving time and effort in scheduling recurring sessions. These additional features provide Power Users with enhanced control and customization options for their sessions.
- Arranging a session on PlayTime does not provide you with any privileged access to a court. Simply check the “Invite-Only” box and then click on the “Edit Invite List…” button. This will open a window where you can search for players by name, email, skill/gender (available for Premium users), or load a previously used list. Only the invited players will receive an email notification and have access to session details on the calendar. The names of attendees will remain hidden from anyone who was not included on the list. If you wish to invite additional players later, you can view the session and click on “Edit List” (visible only to the session originator). Please note that removing a player from the list is only possible if they have not already signed up for the session. When saving lists for future use, it is important to complete the session creation process, as unfinished sessions will not save your list changes. For a visual guide on using the Invite-Only feature, you can click here to watch a video tutorial (opens in a new window).
- By selecting an existing circle on the calendar, you can retrieve comprehensive information about the respective session, including the current roster of players who have registered to participate. Additionally, clicking on the location name lets you access further details about the specific venue. This includes information such as the venue type (indoor or outdoor), the number of courts available, address, phone number, website, and a link to a Google Maps for easy navigation.
- To participate in a session, all you need to do is click on the “Add My Name” button. After adding your name, you will have the opportunity to include additional guests if desired. For example, if you’ve friends who are visiting from out of town or you want to include your spouse without them needing to log in individually, you can click on the “Add Guest” option for each guest you wish to bring. Premium Users also have the opportunity to input their guest’s name or provide additional relevant information.
- Once you have added your name to a session, if circumstances arise where you are unable to participate, it is important to remove your name as a courtesy to other players. To do this, click on the session and locate the (x) symbol next to your name. To remove your name from the session, simply click on the (x) symbol. This action will not only remove your name but also automatically remove any guests listed beneath your name.
To access further guidance, follow the steps I took and click on the “Help” button located in the User box at the upper left corner of the screen. By doing so, you will be able to explore additional assistance provided in the guide.
Conclusion
After going through this article, I am sure every pickleball lover can take advantage of Playtime Scheduler for pickleball. So read it step by step and visit the website of the playtime scheduler for pickleball.
